
How to Record Pro-Level Guitar Tracks at Home
One of the most common questions among guitar players and producers is how to get a professional-sounding guitar recording at home.
Gone are the days when you needed an expensive tube amp and a high-end set of microphones to record pristine-sounding guitars. In 2025, you can just plug in your instrument into your audio interface and get to action.
However, with more options than ever, it’s essential that you follow a few guidelines to get your guitar sounding mix-ready. In this article, we’ll explore how to record pro-level guitar tracks at home.

Setting Up the Basics
As always, you’ll need a solid foundation before you start recording. It doesn’t have to be anything fancy, but things like high-quality cables and accessories are always a great investment.
- Audio Interface: This is the heart of your recording chain. Look for one with at least a single instrument input and reliable preamps. Even entry-level models today can deliver excellent quality.
- Computer and DAW: A modern laptop or desktop is enough to get started. Pair it with a DAW (Digital Audio Workstation) like Reaper, Logic, Ableton, or Pro Tools. Don’t overthink it, choose the one that feels intuitive and stick with it.
- Monitoring: While professional studio monitors are ideal for mixing, a good pair of closed-back headphones is more than enough for tracking guitars at home. As you improve, you can always expand your setup.
- Cables and Accessories: High-quality cables can very well be an excellent long-term investment, so never underestimate their importance.
DI vs. Mic’d Amps
One question often arises among musicians and producers recording at home: Is it better to record your guitar DI (direct to your audio interface) or to mic a real amp?
Honestly, nowadays, the quality difference between a DI recording and a mic’d amp is negligible. Recording DI will give you much more flexibility, though, as you can experiment with different plugins at pretty much any point during your production process.
But, if you already have an amp that you like the sound of, it’s always a great idea to give it a try, as you will be able to get a ton of tones using a single mic.
DI Guitar Tracking Tips and Techniques
If you opt to go the DI route, there are a few basic things you should keep in mind before pressing record.
Set the Right Input Level
Aim for a strong signal without clipping. You don’t need to push your audio interface’s gain to the limit, especially if you plan on using multiple plugins. A good rule of thumb is to keep your peaks around -18 dB to -12 dB. This gives you headroom to work with when mixing.
Try Different Plugins and Amp Emulations
Nowadays, there are so many different plugins that emulate real tube amps and analog pedals, and they sound extremely similar to the real thing. Third-party plugins like Guitar Rig and Amplitube are some of the most popular choices, but many DAWs like Logic Pro come packed with very decent-sounding stock amps.
The secret to making those plugins sound as natural as possible is not to rely solely on presets but to create your own custom settings, add some reverb for ambience, and combine two or more amp models.
Consider Using Analog Pedals
You can and should use analog pedals while recording DI guitar. An analog overdrive or distortion placed right before your audio interface’s input can do wonders for your tone. You just need to be careful with your power source so as to avoid any hum or noise. A cheap way to solve ground-loop issues is to power your pedal through a battery when recording DI.
Modulation and time-based pedals can also be used with DI recordings, but they often sound their best when placed after your amp plugin. To achieve that, you can run your processed signal from your DAW into your pedal and back into your audio interface’s output, essentially creating an FX loop.
Amp Mic’ing Tips and Techniques
Although DI recording gives you more flexibility, mic’ing a real amp can help you achieve that extra warmth and dynamic response that your tone is lacking, plus, the experience can be quite fun and rewarding.
Choosing the Right Microphone
A dynamic microphone, for example, the Shure SM57, is the most popular and versatile choice for mic’ing guitar amps, thanks to its versatility and its ability to handle extreme sound pressure levels, but you can use pretty much any mic, depending on what kind of tone you’re after.
Condenser mics are also a popular choice for more detailed material and clean tones. They have a much higher sensitivity than their dynamic counterparts, though.
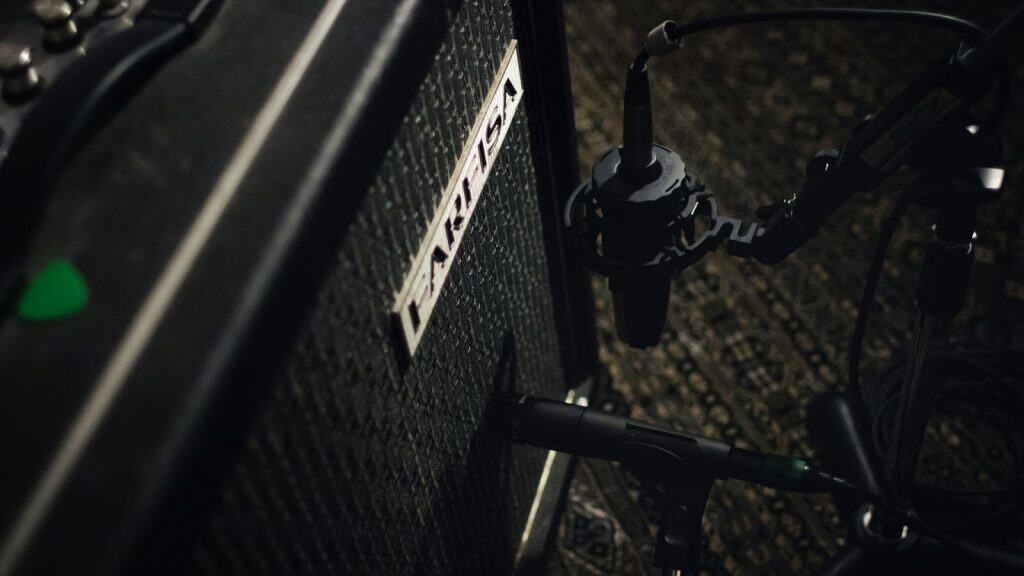
Positioning Your Microphone
There are several mic’ing techniques you can use to record an amp. The most traditional one is the on-axis technique: positioning your microphone right in front of your speaker, a few inches away from the grille. This is a good starting point for any kind of tone you might be after.
From there, you can move your mic slightly off-axis or away from your amp to get a different tonal profile. The closer the microphone is to the speaker, the brighter your sound will be.
Using Two or More Microphones
If you want to take things up a notch, you can record your amp with two or more microphones. Some of the most popular techniques among producers include using an on-axis and an off-axis mic, or even a stereo pair to capture your room’s sound.
This technique gives you much more flexibility and control over your tone, especially in the mixing phase.
Editing and Mixing Basics
Once you finish recording your guitar tracks, the real magic happens in editing and mixing. Even an excellent performance can benefit from a little polish to make it sit perfectly in the mix.
Comping Multiple Takes
One of the best ways to achieve a flawless guitar track is to record several takes of the same part and combine the best parts from each. This process, known as comping, lets you stitch together the strongest performances and get a tight track that sits right in the mix.
Most DAWs automatically organize multiple takes into a single audio track layer, so you will just have to audition and select the best parts to build the final version.
Tightening Up the Performance
Use your DAW’s editing tools to clean up timing issues, remove unwanted noise, and cut silent sections between riffs. Subtle tightening can make a track sound more professional without losing its natural feel.
EQ for Clarity
When you EQ your guitar parts, think of your song as a whole and not as a solo performance. Your guitar tone might sound weak on its own, but it will sound cohesive when placed alongside your vocals, drums, and bass.
There’s no magic rule to EQing, and you’ll have to make decisions based on your whole mix. Always carve space for your guitar tone to shine while balancing it against the other instruments. As a rule of thumb, you can also use low and high-pass filters to remove any excess rumble and harshness from your tone, respectively.
Use Compression for Consistency
Compression is a must if you want a solid guitar track. A subtle touch of the effect can go a long way, especially when you’re dealing with multiple guitar layers and you want to glue them together.
Just like with EQ, there’s no one-size-fits-all when it comes to compression, and you will have to try different settings. Start with a reasonable threshold, a short attack, and a medium release, and work your way up from there.
Layering and Panning
For wide, powerful rhythms, double-track your parts and pan them left and right. Leads and solos can sit more in the center, with effects like reverb or delay giving them depth without cluttering the mix.
Frequently Asked Questions
Should I Record Guitars Direct (DI) or Mic an Amp?
Both methods work well in modern music production. DI offers more flexibility and easier editing, while mic’d amps can give a more natural dynamic response and extra warmth. Many producers use a blend of the two.
How Many Takes Should I Record for Each Part?
It depends on your playing consistency, but in most cases, the more takes you can record, the better. Recording multiple takes gives you options and allows for comping, where you combine the best parts of each performance into one track.
What’s the Best Way to Get Wide, Powerful Rhythm Guitars?
A tried and true technique is to double-track the same part and pan one take left and the other right. For an even bigger sound, you can record four or more takes and layer them. Just be careful not to create frequency clashing with other instruments.
Conclusion: How to Record Pro-Level Guitar Tracks at Home
Nowadays, recording pro-level guitar tracks at home is easier than ever. With the right guidelines and techniques, you just need an audio interface and a few plugins to get the perfect tone for your song. If you want to take things further, experimenting with mic’d amps can add depth and character that gives your sound a final polish
Written by Ian Sniesko from DeathCloud, curating the finest guitar pedals for tone chasers and gear heads alike.


