Vocal production stands as the cornerstone of creating hit records. Did you know that, according to a 2019 study published in “Frontiers in Psychology,” listeners can detect pitch corrections in music about 70% of the time? This statistic underscores not only the prevalence of vocal processing in modern music but also the critical importance of applying these techniques skillfully and subtly.
Welcome to the ultimate vocal production guide for 2025. As an experienced music producer with 10 years of experience and over 30 Million streams, I’ve spent years honing these skills, and I’m excited to share my knowledge with you.
Whether you’re a budding producer working from a home studio, an experienced professional looking to refine your skills, or simply curious about the intricacies of vocal production, you are in the right place.
This comprehensive guide, along with my rundown of the Best Vocal Production Gear In 2025, will take you on a journey from raw vocal recordings to polished, professional-grade tracks that captivate listeners and impress industry veterans alike.
So, adjust your headphones, open your mind to new possibilities, and let’s begin this journey through the fascinating world of vocal production!
TLDR: The Ultimate Vocal Production Guide For 2025
Optimizing your recording environment and acoustic treatment
Microphone selection and placement techniques
Essential recording and processing techniques
Advanced vocal layering and mixing strategies
Mastering vocal-centric tracks
AI tools in modern vocal production
Optimizing Your Recording Environment
Over the past 10 years, I’ve learned that your recording environment is the cornerstone of stellar vocal production. In my experience, people generally want to invest in equipment or software rather than optimizing their recording environment; And I totally understand that.
So I’ll try to give some strategies to acoustically treat your room without breaking the bank.
Acoustic Treatment: Taming the Wild Soundwaves
The DIY Approach to Studio Acoustics
When I started out, my “studio” was essentially a closet with a mic in the middle. Not ideal, but we all start somewhere, right? The game-changer was learning about acoustic treatment.
Quick Tip: Start with the corners of your room. Bass traps in the corners can make a world of difference in your sound.
Here’s a step-by-step guide to DIY acoustic treatment on a budget:
Gather materials: Rockwool, fabric, and a staple gun
Build frames for your panels (wooden frames work well)
Fill frames with rockwool
Cover frames with fabric
Hang panels at reflection points in your room
For the ultra-budget-conscious, even hanging thick blankets on the walls and placing a carpet on hardwood floors can help. It’s not perfect, but it’s a start.
And don’t forget the carpet if you have a hardwood floor.
Now, let’s move to your first piece of gear.
Microphone Selection: Finding the Perfect Match
Choosing the right microphone is like finding the perfect pair of jeans – it’s all about the fit. Let’s break down the types:
The Polar Pattern Puzzle
Understanding polar patterns is crucial for capturing the best sound:
Cardioid: Heart-shaped pickup, ideal for isolating the sound source
Omnidirectional: Picks up sound from all directions, great for room ambience
Figure-8: Picks up sound from front and back, useful for duets or mid-side recording
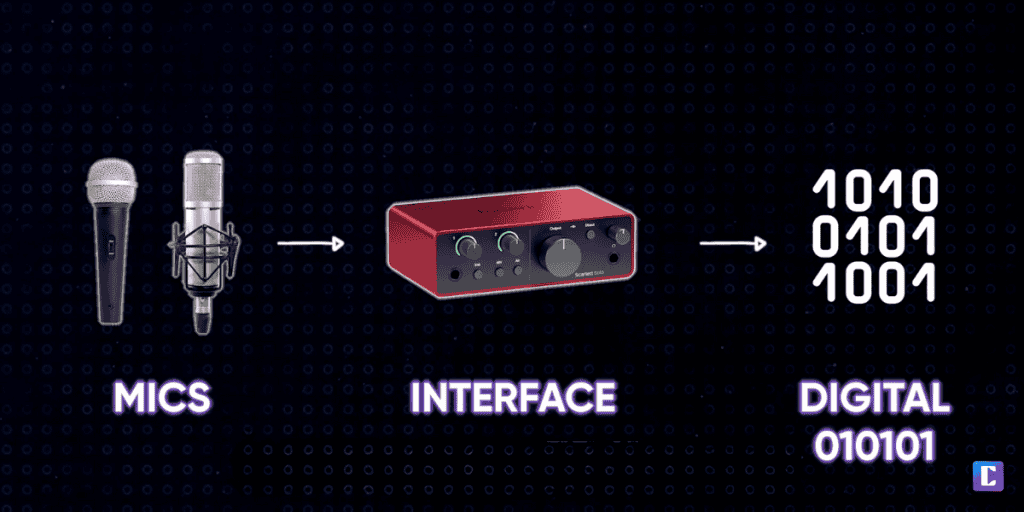
An audio interface is your digital audio workstation’s (DAW) gateway to the analog world. It converts analog signals from your mic into digital data your computer can process.
Key features to consider:
Bit depth and sample rate (aim for at least 24-bit/96kHz)
Number of inputs/outputs
Latency performance
Preamp quality
The Magic of Preamps
Don’t overlook the power of a good preamp. It can add color and character to your sound that no plugin can truly replicate.
Pro Tip: When choosing a preamp, consider its “color.” Some preamps are known for their clean, transparent sound, while others impart a distinct character.
Understanding the Signal Chain
Understanding your signal chain is crucial for achieving the best sound quality. Here’s a typical vocal recording signal chain:
Sound source (vocalist)
Microphone
Preamp
Audio Interface
Digital Audio Workstation (DAW)
The Art of Gain Staging
Proper gain staging ensures you’re getting the best signal-to-noise ratio without distortion. Use the “traffic light” method:
Green: Optimal level
Yellow: Occasional peaks
Red: Avoid! Risk of distortion
Remember, in the digital world, there’s no benefit to “hitting the red.” Keep your levels conservative to maintain headroom for mixing and mastering.
The Path to Vocal Excellence
Now that we’ve optimized our recording environment, we’re ready to tackle the next crucial step in our vocal production journey.
As we move forward, we’ll dive into the intricacies of capturing that perfect vocal take. From microphone placement to working with vocalists, we’ll explore the techniques that transform a good recording into a great one.
Pro-sounding vocal recording techniques
Let me guide you through the delicate art of capturing the perfect vocal take. After a decade of recording sessions, I’ve learned that great vocal recording is a beautiful dance between technical precision and emotional intuition.
The Science of Microphone Placement
Understanding the Sweet Spot
The perfect mic placement is like finding the acoustic goldilocks zone. Here’s a field-tested approach:
Start 6-8 inches from the vocalist
Position slightly off-axis (10-15 degrees)
Adjust height to match vocalist’s mouth level
Use a pop filter to manage plosives
Quick Definition: Proximity effect is the increased bass response that occurs when a directional microphone is placed close to a sound source. While it can add warmth, too much can make vocals sound muddy or boomy.
You can watch this video form the Sound Guys to get a good guide on mic placement.
Different Mic setups for different voice types
Different voices require different approaches:
Off-Axis Mic Placement
Off-axis microphone placement is a powerful technique where you position the mic at an angle relative to the sound source rather than pointing directly at it.
Engineers often do this to shape the tone of recordings, as most mics respond differently to sounds arriving from different angles due to their polar patterns.
For instance, placing a cardioid mic 45° off-axis from a guitar amp can help tame harsh high frequencies while maintaining the fundamental tone, since higher frequencies are more directional. This technique is especially useful on bright or harsh sound sources like brass instruments or cymbal overheads.
The amount of off-axis positioning depends on the specific mic, source, and desired sound – start with small angles (20-45°) and adjust by ear.
Gain Staging: The Foundation of Clean Recording
Setting Optimal Levels
The key to pristine recordings lies in proper gain staging:
Optimal Recording Levels: Peak Level: -12 dB Average Level: -18 dB Noise Floor: Below -60 dB
Pro Tip: Use your preamp’s pad switch if your vocalist is particularly dynamic. Better to have a lower, clean signal than a hot, distorted one.
Noise Floor: The noise floor is the baseline level of unwanted background noise in any audio system or recording environment, including electrical hum, preamp noise, and room ambience – it’s like the static you hear when you turn up an “empty” audio channel. Any sounds below this level become inaudible, which is why maintaining a low noise floor is crucial for clean recordings.
Digital Headroom Guide
Green Zone (-24 to -12 dB): Ideal recording level
Yellow Zone (-12 to -6 dB): Acceptable for peaks
Red Zone (Above -6 dB): Danger zone – avoid!
Creating the Perfect Monitor Mix
Essential Monitor Mix Elements
Lead Vocal: Clear and prominent
Backing Track: Slightly lower than the vocal
Reverb: Just enough for comfort (15-20% wet)
Delay: Minimal or none during tracking
The Two-Mix Strategy
The two-mix strategy involves creating two separate headphone mixes during vocal recording: a minimal “tracking mix” with dry vocals and clear backing tracks for accurate performance monitoring, and a “playback mix” with full processing and effects to keep the vocalist inspired.
This approach helps singers stay in pitch while recording but still lets them hear how the final product will sound.
Tracking Mix:
Dry vocal with minimal effects
Clear backing track
Light reverb for comfort
Playback Mix:
Processed vocal
Full arrangement
Production effects
What is vocal comping?
Quick Definition: Vocal comping (or compositing) is the process of creating the perfect vocal take by combining the best parts of multiple recordings.
Best Practices for Comping
Record 3-5 complete takes
Focus on full phrases rather than words
Listen for emotional delivery
Watch for consistent tone and energy
Keep alternative comps for different sections
Vocal Comping Workflow
How to balance Emotional vs. Technical aspects
Score your takes using this framework:
Creating Magic in the Recording Process
Remember, while technical excellence is crucial, the magic lies in capturing genuine emotion. Trust your instincts – sometimes a slightly imperfect take with incredible feeling trumps technical perfection.
As we move forward into the next section on vocal editing, we’ll explore how to polish these raw recordings without losing their emotional sparkle. Let’s move on to vocal editing.
Precision Editing for Polished Vocals
Let’s dive into the delicate world of vocal editing, where technical precision meets artistic intuition. After thousands of editing sessions, I’ve learned that the best edits are the ones nobody notices.
The Three Pillars of Vocal Editing: Timing, Pitch, Audio Cleanup
1. Timing Alignment: The Groove Factor
Quick Definition: Timing alignment is the process of adjusting the timing of vocal phrases to enhance the rhythmic feel while maintaining natural flow.
Grid-Based vs. Groove-Based Alignment
Pro Tips for Natural-Sounding Alignment:
Align phrase starts, not every syllable
Follow the rhythm section’s pocket
Preserve intentional push/pull moments
Use the grid as a reference, not a rule
2. Pitch Correction: A Subtle Art
Quick Definition: Pitch correction is the process of adjusting the tuning of vocal notes while preserving the natural character of the voice.
Here is a screenshot of my course 10 Day-Singer Producer, using the LOGIC Pro Flex to do some pitch correction.
Pitch Correction Strategy Guide
3. Audio Cleanup: The Fine Details
Essential Cleanup Checklist
Remove unwanted noises
Manage breath volumes
Fix plosives and sibilance
Address mic bleed
Eliminate clicks and pops
Preserving Character While Perfecting Performance
Quality Control Checklist:
Timing feels natural and groovy
Pitch is accurate but not robotic
Breaths sound natural
No technical artifacts
Emotional impact preserved
Performance flows well
Context check in full mix
Making the Transition to Processing
Now that we’ve polished our vocals while preserving their emotional core, we’re ready to shape them sonically. In the next section, we’ll explore how to use processing to enhance these edited vocals, turning them into powerful, professional-sounding productions. Get ready to dive into the world of EQ, compression, and creative effects!
Remember: The best editing is invisible – it enhances the performance without drawing attention to itself.
Shaping Your Vocal Sound Through Processing
What is the Vocal Processing Chain?
The vocal processing chain is a structured sequence of audio tools and effects applied to enhance the clarity, tonal balance, and depth of a vocal track.
The process begins with gain staging, where the signal is set to an optimal level to avoid distortion or noise. Next, noise reduction is applied to eliminate unwanted background sounds.
Following this, de-essing is used to reduce harsh sibilant frequencies (like “s” or “sh” sounds). Then comes subtractive EQ, which removes problematic frequencies and cleans up the vocal tone.
This is followed by compression, which balances the dynamic range to ensure a consistent vocal level. Creative elements are introduced next, starting with saturation or excitement, which enhances the harmonic richness and character of the vocal.
Finally, reverb and delay add spatial effects to create a sense of depth and ambiance. The order and execution of these steps are crucial for achieving a professional-quality vocal mix.
Of course, different producers and engineers swap this sequence around. But this sequence is what I’ve to be the most helpful.
Gain Staging
Gain staging is the process of setting optimal signal levels throughout your audio chain. It ensures clean sound with minimal noise and enough headroom for processing. The goal is to maintain consistent levels around -18 dBFS at each processing stage, preventing distortion while maximizing signal quality.
Quick Gain Staging Guide
Stage
Target Level
Why
Recording
-18 to -12 dBFS peaks
Optimal headroom
Plugin Chain
-18 dBFS average
Clean processing
Final Output
-6 dBFS peaks
Mastering headroom
🎯 Pro Tip: Start with a gain plugin at -18 dBFS peaks before any processing. Your plugins will thank you!
Noise Reduction
Noise reduction removes unwanted background sounds while preserving the natural character of the voice. The key is subtle treatment – you want to clean up distracting noise without making vocals sound processed.
Common Noise Types and Solutions
Noise Type
Treatment Approach
Room Noise
Light overall reduction (-6 to -12 dB)
Mic Self-Noise
Gentle high-shelf cut
Digital Artifacts
Targeted cleanup
💡 Quick Win: Always record room tone! It’s your secret weapon for clean noise reduction.
De-essing
De-essing controls harsh sibilance (“S” and “T” sounds) in vocals. The goal is smooth, natural-sounding vocals without lisping effects.
De-essing Essentials
Parameter
Starting Point
Frequency
5-8 kHz
Reduction
-3 to -4 dB
Attack
0.1 ms
Release
10-15 ms
🎓 Pro Tip: Two gentle de-essers often work better than one aggressive one!
Subtractive EQ
Subtractive EQ focuses on removing problematic frequencies rather than boosting desired ones. This approach helps achieve a cleaner, more natural vocal sound by eliminating muddy, harsh, or resonant frequencies that mask the voice’s natural character.
Traditional EQ vs. Subtractive EQ
Traditional EQ boosts frequencies to enhance sound, while subtractive EQ removes unwanted frequencies to reveal clarity. Think of it like this: boosting is like turning up the treble on your stereo, while cutting is like cleaning a dirty window – letting the natural sound shine through.
Critical EQ Frequency Guide
🎯 Quick Win: Start with a high-pass filter at 80 Hz and hunt for resonances by sweeping a narrow boost around the spectrum.
Compression balances vocal dynamics by reducing the volume of louder passages while maintaining the quieter ones. The goal is consistent, professional-sounding vocals that sit perfectly in the mix.
Two-Stage Compression Guide
Stage
Settings
Purpose
First (Gentle)
2:1 ratio, -20 dB threshold
Level balancing
Second (Peak)
4:1 ratio, -12 dB threshold
Peak control
💡 Pro Tip: Watch your gain reduction meters – aim for 3-6 dB on the first compressor and 2-3 dB on the second.
Saturation/Excitement
Saturation adds harmonic richness and character to vocals by introducing subtle distortion. When used properly, it helps vocals cut through the mix while adding warmth and depth.
Saturation Approaches
Type
Effect
Best For
Tube
Warm harmonics
Thin vocals
Tape
Subtle compression
Digital harshness
Multiband
Focused excitement
Dull recordings
🎓 Best Practice: Start with 10-20% mix and increase until you hear it, then back off slightly.
Reverb/Delay
These spatial effects add depth and dimension to vocals. The key is using them to enhance the vocal without washing it out.
Quick Effects Guide
Effect
Starting Point
Purpose
Room Reverb
0.8s decay, 15% wet
Natural space
Plate Reverb
1.2s decay, 20% wet
Classic shine
Slap Delay
60-120ms, 15% wet
Thickening
Quarter Delay
Tempo-synced, 20% wet
Width
🎯 Top Tip: Use pre-delay (20-30ms) on reverbs to maintain vocal clarity.
Vocal Chain Templates: Genre-Specific Approaches
Different genres need different vocal flavors. Here’s my go-to vocal chains for popular styles:
🎯 Pro Tip: Save these as starting templates, but always adjust for the specific vocalist and song!
Common Genre-Specific Settings
Pop Vocals:
Compression: 2:1 ratio, gentle
Reverb: Short plate (0.8-1.2s)
EQ: Light presence boost (5-8kHz)
Hip-Hop Vocals:
Compression: 4:1 ratio, aggressive
Saturation: Warm, tape-style
Reverb: Tight room only
Rock Vocals:
Parallel Compression: Heavy (mixed 30-40%)
EQ: Mid-forward (2-4kHz emphasis)
Delay: Slap back for thickness
Remember, these are just starting points. Great vocal production is about serving the song, not following rules. Trust your ears and adjust accordingly!
Vocal Layering: Building Depth & Dimension
Vocal layering is the art of combining multiple vocal tracks to create richness and depth in your production. From subtle doubles to full harmonies, layering can transform a simple vocal into a powerful, professional-sounding arrangement.
Essential Layering Techniques
Layer Type
Purpose
Placement Tips
Main Double
Thickening
10-20% panned L/R
Tight Double
Precision
Under main, centered
Wide Double
Space
40-60% panned L/R
Harmonies
Depth
30-80% panned L/R
Whispers
Texture
Very wide, low volume
Pro Tips for Common Layers
Lead Vocal:
Center position
Full frequency range
Primary focus
Doubles:
Slightly quieter (-3 to -6 dB)
Light high-pass filter
Gentle compression
Harmonies:
Lower harmonies: moderate panning
Higher harmonies: wider panning
Reduced midrange
🎓 Real Studio Story: I learned an incredible whisper-layering technique from my friend Aziz Maraka. In one of his tracks, we created this haunting texture by layering whispered vocals behind the main performance. It added this intimate, emotional quality that really made the track special. You can hear it in his song where he sings “You’re the most beautiful one.”
Quick Layering Guide by Genre
Genre
Common Layers
Processing Tips
Pop
Main + 2 doubles + harmonies
Bright, wide processing
Rock
Main + single double
More aggressive compression
R&B
Main + multiple harmonies
Smooth EQ, longer reverb
Folk
Main + octave harmonies
Natural, minimal processing
💡 Pro Tip: Record each harmony part twice and pan them opposite each other for extra width!
Avoiding Common Layering Mistakes
Over-layering
Keep it purposeful
Remove unnecessary layers
Focus on quality over quantity
2. Processing Chain
High-pass filter (100-120 Hz)
Light compression
Gentle reverb (different per layer)
Mixing Vocal Layers: The Art of Placement
Think of your mix like a 3D photograph – you’ve got width (panning), depth (reverb/effects), and height (frequency space). Let’s break down how to place each layer perfectly.
The 3D Vocal Space Guide
Dimension
Element
Technique
Purpose
Width
Panning
Center → Wide
Creates space
Depth
Effects
Dry → Wet
Adds dimension
Height
EQ
Full → Filtered
Frequency clarity
Quick Processing Guide by Layer
Lead Vocal:
Center position
Minimal reverb
Full frequency range
Primary Doubles:
15-20% L/R
Matched reverb
Slight high cut
Background Harmonies:
40-60% L/R
More reverb
High-pass at 150Hz
🎯 Pro Tip: Use different reverbs for each layer type. Short plate for leads, longer hall for harmonies – creates natural separation!
Frequency Real Estate
Layer Type
Key Frequency Focus
What to Cut
Lead
2-5 kHz presence
Below 100 Hz
Doubles
1-3 kHz body
Above 10 kHz
Harmonies
3-8 kHz air
300-800 Hz
Whispers
5-10 kHz clarity
Below 200 Hz
Volume Balancing Framework
Set Your Foundation
Lead vocal at average -18 dBFS
Doubles 3-6 dB below lead
Harmonies 6-10 dB below lead
Effect layers to taste
Automation Points
Verses: Minimal layers
Chorus: Full stack
Bridge: Build layers gradually
Outro: Creative fade choices
💡 Quick Win: Use VCA groups to control entire vocal stacks with one fader!
Remember, these aren’t rigid rules – they’re starting points. Every song needs its own balance, but this framework will get you in the ballpark fast.
Let’s dive into some pro-level tricks and fixes for common layering headaches. After years of trial and error, these are the techniques that consistently deliver results.
Creative Layer Types
Technique
Effect
Best Used For
Octave Down
Depth & Power
Choruses, Hooks
Whisper Layer
Intimacy
Verses, Bridges
Telephone Effect
Texture
Build-ups
Reverse Reverb
Drama
Section Transitions
Common Problems & Solutions
Problem
Cause
Fix
Muddy Mix
Too many low-mids
High-pass harmonies progressively higher
Phase Issues
Poor alignment
Use delay compensation, align manually
Lack of Clarity
Competing frequencies
Assign different EQ zones to each layer
Timing Problems
Stacked imperfections
Use light flex-time or manual alignment
🎓 Pro Tip: When timing is slightly off between layers, don’t always rush to fix it. Sometimes those micro-timing differences create a more natural, fuller sound!
Advanced Processing Chain
Group 1 (Leads):
Surgical EQ
Tight compression
Controlled reverb
Group 2 (Harmonies):
Wider EQ cuts
Parallel compression
Longer reverb tail
Group 3 (Effects):
Creative filtering
Heavy processing
Distinct space
Troubleshooting Checklist
Layers fighting? Check phase relationships
Too wide? Reduce panning extremes
Not wide enough? Try mid-side processing
Muddy? Progressive high-pass filtering
Harsh? Parallel saturation instead of EQ boost
Inconsistent? More automation needed
💡 Real-World Tip: Create a dedicated pre-master bus for all vocals. This gives you one final place to control the entire vocal production before it hits your master bus.
Genre-Specific Layer Counts
Genre
Maximum Layers
Notes
Pop
8-12
Main + doubles + stacks
Rock
4-6
Keep it powerful but raw
Hip-Hop
2-4
Focus on main + accent
EDM
6-8
Heavy processing okay
Final Mix Integration: Making Vocals Sit Perfectly
This is where everything comes together. The best vocal production in the world means nothing if it doesn’t fit perfectly in your mix. Let’s nail this final stage.
Mix Integration Strategy
Stage
Action
Target
Initial Balance
Set levels
Lead vocal clear but not dominant
Space Clearing
Dynamic EQ
Create pocket for vocals
Glue
Bus Processing
Blend layers with mix
Polish
Automation
Natural dynamics
Frequency Priority Map
Lead Vocal Priority Zones:
2-5 kHz: Main presence
5-8 kHz: Air and clarity
200-500 Hz: Weight
Everything Else:
Instruments duck in vocal zones
Bass stays strong below 150 Hz
Cymbals/highs above 10 kHz
💡 Quick Win: Use dynamic EQ on competing instruments. When vocals come in, problem frequencies automatically duck out of the way!
Bus Processing Chain
Bus Type
Processing
Purpose
Lead Bus
Gentle glue compression (2:1)
Overall control
BG Bus
More aggressive (4:1)
Tight backing vox
Master Vocal
Subtle tape saturation
Final polish
Essential Automation Points
Volume Moves
Verse entrance: -1dB
Pre-chorus build: +0.5dB
Chorus hit: +1dB
Post-chorus fall: -1dB
Effect Rides
Verse: 15% reverb
Chorus: 25% reverb
Bridge: 30% reverb + delay
Outro: Creative build
🎓 Pro Tip: Create a “confidence” fader – a 0.5dB boost you can automate for important phrases or words that need to cut through.
Final Checklist
Vocals sit in mix without masking
Consistent level across sections
Clear without being harsh
Effects enhance but don’t dominate
Dynamics feel natural
All layers gel together
Mastering Vocal-Centric Tracks: The Final Polish
After years of mastering tracks, I’ve learned that this final stage is less about technical perfection and more about making sure your vocal production truly connects with listeners. Let me share what really matters.
The Loudness Sweet Spot
Here’s the thing about mastering vocal-heavy tracks – you need to find that perfect balance where the track is competitive in terms of loudness but still maintains all the subtle vocal dynamics you crafted.
🎓 Personal Note: My mentor Mafdy in Cairo taught me something that changed my whole approach – start mastering at low volumes. When you nail the balance at whisper levels, it’ll translate beautifully when turned up.
Essential Mastering Targets
A professional vocal master should hit these key marks:
Integrated loudness: -14 to -12 LUFS for streaming
True peak: Never above -1.0 dB
Vocal presence: Clear without harshness
Dynamic range: Enough to let vocals breathe
Parameter
Target
Purpose
LUFS
-14 to -12
Streaming standard
Peak
-1.0 dB
Clean playback
Crest Factor
8-10 dB
Dynamic vocals
Low End
Below 150 Hz
Controlled but present
Vocal Range
2-5 kHz
Clear but not harsh
The Power of Stem Mastering
One game-changer for vocal-centric productions is stem mastering. I remember working on an R&B track where the vocal was perfect in the mix but got lost in the standard mastering process. Breaking it into stems saved the day:
Recommended Stems:
Lead Vocals
Backing Vocals
Instruments
Rhythm Section
Processing Order:
Balance stems individually
Apply gentle bus processing
Final limiting with care
💡 Pro Tip: When stem mastering, resist the urge to completely rebuild the mix. Small adjustments go a long way.
The Reality Check
Before calling any master final, I always run through what I call the “Real World Test”:
Listen on at least three different systems
Check how the vocals translate to phone speakers
Compare to reference tracks in your genre
Take a break and listen fresh tomorrow
Remember what I learned the hard way – a rushed master is never worth it. If you’re not sure, sleep on it. Your ears (and your listeners) will thank you.
The Rise of AI in Vocal Production: Revolutionizing the Studio
Alright, let’s dive into the fascinating world of AI in vocal production. As someone who’s been in the trenches of music production for years, I’ve seen some pretty wild changes, but nothing quite as revolutionary as the rise of AI in our studios.
When I first started out, vocal production was all about raw talent and painstaking manual adjustments. I remember spending hours hunched over my console, tweaking EQ settings and comping takes until my ears felt like they were bleeding. But, for better or for worse, has the game changed! And we need to be prepared.
AI in Vocal Production: The New Frontier
Let me tell you something – when I first heard an AI-generated harmony, I nearly fell out of my studio chair. The game has changed, and it’s changing fast. Let’s explore how AI is revolutionizing vocal production, while keeping it real about what matters most: serving the song.
The Reality of AI Tools Today
Think of AI as your intelligent assistant, not your replacement. Here’s what’s actually working in today’s studios:
💡 Real Talk: “You won’t be replaced by AI; you’ll be replaced by someone who knows how to use AI.” This hit home for me when I watched a younger producer finish in 20 minutes what would’ve taken me 2 hours.
Current AI Powerhouses
Pitch Correction Evolution
Natural-sounding tuning
Real-time processing
Genre-specific algorithms
Smart Harmony Generation
Where AI Actually Helps
What Used to Take Hours:
Recording multiple takes
Tuning each harmony
Matching breaths and timing
Now: One-click harmonies that actually sound human
Where AI Actually Helps
Task
Old Way
AI Way
Tuning
Manual, note by note
Intelligent, context-aware
Harmonies
Multiple recordings
Generated from lead vocal
De-essing
Careful threshold setting
Adaptive processing
🎓 Studio Story: Last week, I was working with a singer who couldn’t stick around for backing vocal sessions. Using AI harmony generation, we created convincing backgrounds that perfectly matched her tone. She couldn’t tell which parts she’d actually sung!
Keeping It Real
Look, AI is powerful, but it’s not magic. Here’s what you still need:
Good performances
Musical judgment
Creative vision
Quality recordings
Remember: AI is like having a really smart intern – it can handle the tedious stuff while you focus on the creative decisions that really matter.
However, to be fair, we also need to talk about some ethical considerations surrounding AI. You’ve already seen I like my philosophy, so brace yourself for some ethical philosophy.
Ethical considerations and the future of AI in vocal production
As AI rapidly advances in vocal production, we must consider the ethical implications carefully. When AI can perfectly recreate any voice, questions about consent, copyright, and artistic integrity become crucial.
While I’m excited about the possibilities – imagine generating complete vocal performances with a simple prompt! – I’m also concerned about potential misuse.
Here’s what I’ve learned in my 10years in the music industry: being a true artist is about character, not just tools or talent. If everything becomes quick and automated, we risk losing the growth that comes from struggle and experience.
Use AI, absolutely – but don’t let it rob you of your artistic journey. Your character, shaped by real experiences and challenges, is your true treasure.
You’ve come a long way on this vocal production guide. From capturing the perfect take to shaping it with effects, from layering harmonies to integrating it all into a killer mix – you’ve done it all. So take a moment to pat yourself on the back. You’ve earned it!
Conclusion
As we wrap up this journey through vocal production, remember that while technical excellence is crucial, the heart of great vocal production lies in capturing and enhancing genuine emotion. We’ve covered everything from creating the perfect recording environment to exploring AI tools, but perhaps the most important lesson is this: tools and techniques evolve, but the fundamental goal remains unchanged—creating powerful, emotionally resonant recordings that connect with listeners.
Take these techniques, experiment with them, and develop your own unique approach. Trust your ears, follow your instincts, and never stop learning. The next great vocal production might be just around the corner, waiting for you to bring it to life.
FAQ
While there are many crucial elements, the quality of the initial recording is paramount. Focus on creating a great recording environment, choosing the right microphone, and capturing a stellar performance.
Not necessarily. While high-end gear can make a difference, technique and knowledge are more important. Many great recordings have been made with modest equipment.
Use a combination of EQ, compression, and automation. Also, consider using techniques like sidechain compression to create space for the vocals in the mix.
Pitch correction is a standard tool in modern production. When used subtly, it can enhance a good performance without sounding unnatural.
Consider the genre and the emotion of the song. Start with subtle settings and adjust to taste. Remember, less is often more when it comes to reverb.
Record each part separately for maximum control. Pay attention to blend and consider using different microphones or techniques to add variety.
Aim for a balance between competitiveness and dynamics. Use loudness meters and reference tracks, but prioritize clarity and emotion over pure volume.
Absolutely! With proper acoustic treatment, good techniques, and practice, you can achieve professional results in a home environment.
Use proper microphone technique during recording, and apply de-essing during mixing. Be careful not to overdo it, as some sibilance is natural.
Practice regularly, analyze professional productions, seek feedback from peers, and never stop learning. Consider taking online courses or workshops to accelerate your progress.
I am an international producer with over 30 Million streams. I founded Creators of Sound to help musicians, singers-songwriters, and sound engineers to navigate their way around the world of music production, and to take their passion for music to the next level.
I am an international producer with over 30 Million streams. I founded Creators of Sound to help musicians, singers-songwriters, and sound engineers to navigate their way around the world of music production, and to take their passion for music to the next level.